PhotoModeler seems to be a very interesting and exciting piece of software with great potential in the architectural field. The software could be used during the site analysis stage of the design process. 3d digital models of existing buildings could potentially be created from photographs giving context to a project. These models could also be very helpful when renovating or adding on to an existing buildings. The software also has the potential to be used in the sketch design process, photos of handmade models could be used to create 3d digital models which could then be exported into other programs such as Cad, Rhino, Vis and ArchiCad for design development. Another possible use of this software is the documentation and cataloguing of historic buildings.
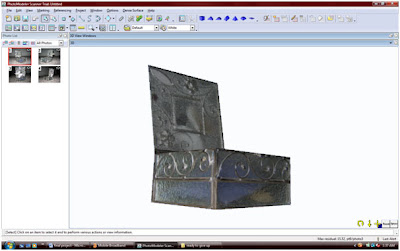
I attempted to use the software to create a 3d model of the RAIA offices on Broadway by Julius Elischer. Unfortunately the software proved more difficult to use than first predicted. After 3 failed attempts at recreating this building in the digital world I moved to a simpler object. The jewellery box I used proved to be much easier and I quickly created a 3d view that well represented the original photos. This proves that the software will work with personal photographs.
For my model I think I am going to have to go to plan B. I propose building a simple handmade model photographing it and attempting to use PhotoModeler to recreate it. I will then export the file to Cad adjust it as necessary and print to the 3D printer to see how accurately the program can recreate a subject from a photograph.
I also looked at a program called Photosynth. Unlike PhotoModeler this software stitches photo’s together, similar to Autostitch to create a curved panoramic view that gives the allusion of being 3D. It is an interesting piece of software that could be used in the site analysis stage of the design process. The synths created have the potential to allow international/interstate architectural firms to view the proposed site in a 3d representation. The main problem I found with this software is that the resulting synths can only be viewed online by the synth viewer, it does not allow for exportation of the project into other software. If it was possible to export the resulting synth into programs such as Photoshop, Indesign and Powerpoint it could become a very powerful presentation tool.
The synth I created of the RAIA offices on Broadway was successful but as it cannot be exported for use in other programs it is not going to be of any use in creating a model. I could create a synth of the final model.
In conclusion it was very disappointing that my exploration into PhotoModeler was not more successful. I still believe that the program has potential in the architectural world but feel that a lot of training and practice would be necessary to create accurate complex representations of buildings.


 I then marked all the points of the window reveals visible in photo one...
 and referenced them into every other image they appeared in.
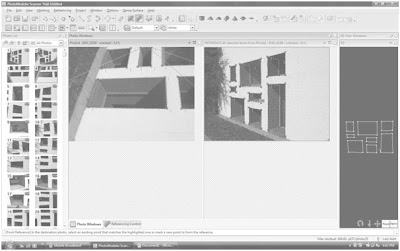
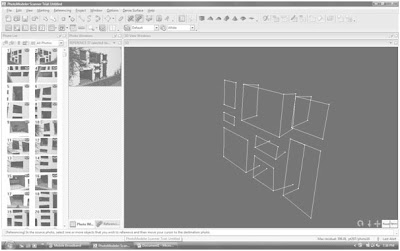 I opened photo two and marked any missing points which were visible on this image, then referenced them into every photo which showed a corresponding point. Moving onto photo 3, 4, 5, etc I continued marking and
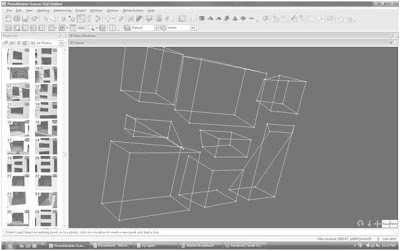
 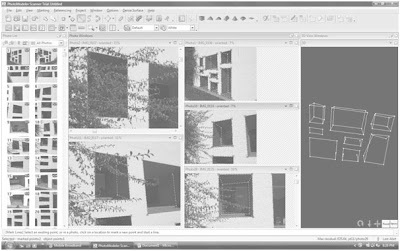 When all the points were marked and referenced I hit the process button again. Unfortunately the 3d model, despite showing all the points
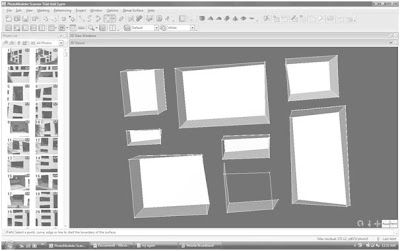
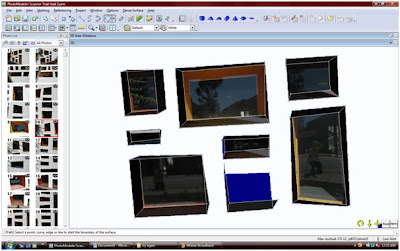


