Tuesday, September 29, 2009

Photomodeler scanner - footprint tutorial

I opened the first photo.

Then I idealised both images to make the results more accurate.

Using the automatic target tool I selected all the markers in both photos.

Then using the create dense surface tool I created a surface map of the image.

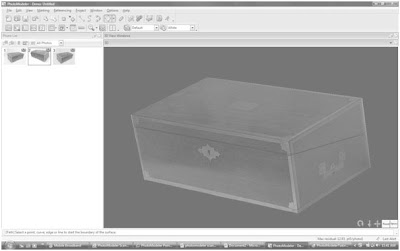
I used the 3d viewer option window to turn on surfaces and point meshes.
Which gave me a 3d view of my point mesh.

I turned on textures in the 3d viewer options and got a coloured/textured representation of the original photos

Back in the create dense surface window I lowered the sampling rate to 1. The result was a much denser, more accurate representation of the original images.

Photomodeler - Introduction to shape based projects.

I opened up photo one.
I clicked on the 3d box tool and orientated it similar to the position of the first box in the photo.


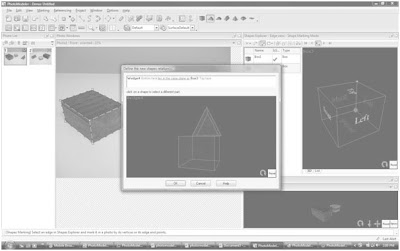
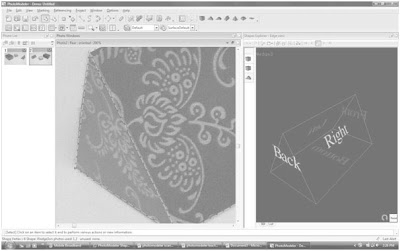
Using the edge tool i clicked on the points on the original photo that corresponded to the points highlighted on the 3d wire frame view.


The wire frame box in the 3d view then appeared as a white shaded block.


Using the 3d view options window I turned on fast textures.

The white shaded box in the three d view transformed into a wooden box.


I used the same process to add the second box to the scene. Then I used the 3d pyramid tool to add the final shape. Adding it to the SAME ground plan as the first two boxes.


Using the same process I marked the points of the prism on the original photo. All three shapes could then be seen in the 3d viewer.

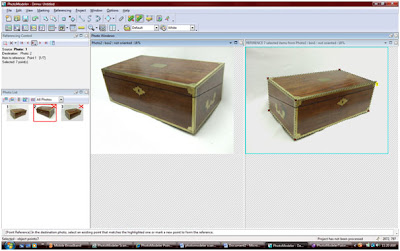
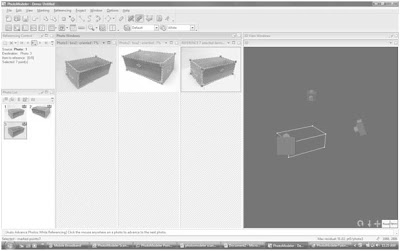
The faces that could not be seen in the first photo were still showing as blank white faces in the 3d viewer so I opened the second photo. Clicking on each shape in the 3d viewer I marked the corresponding points on the second photo for all three boxes.

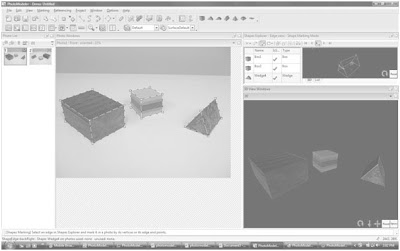
Then I zoomed in on each point on the original photos to adjust my wire frame to be more accurate.


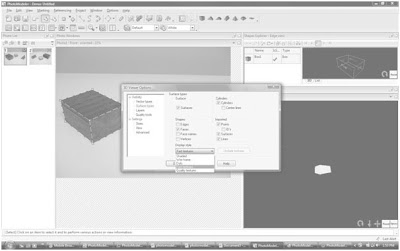
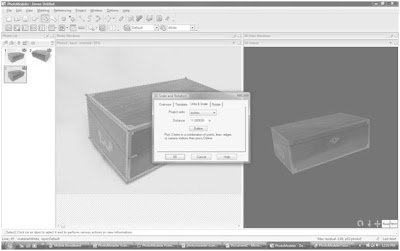
Finally I used the project file menu to open up the scale window and set the units and scale for my project.

The length of any edge could now be found out simply by clicking on it.


The project was complete and ready to be exported for use in other programs.

photomodeler - Introduction to point based projects

Starting with photo one I marked the visible points of the box.

In reference mode, using photo one as the reference image (shown by the blue boundary around the photo), I marked the corresponding points on photo 2.

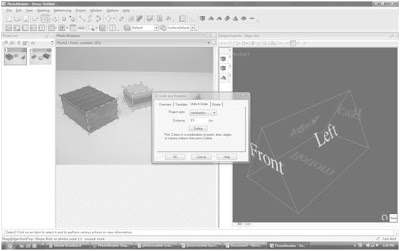
By opening the 3d view I could see how much of the box had been built.


Again using photo one as the reference image I marked the corresponding points on photo three. Camera position were now solved and could be seen in the 3d view port.

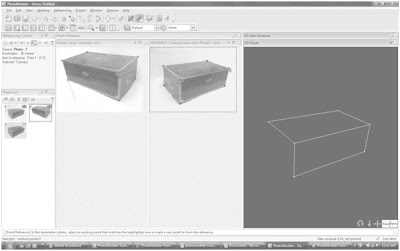
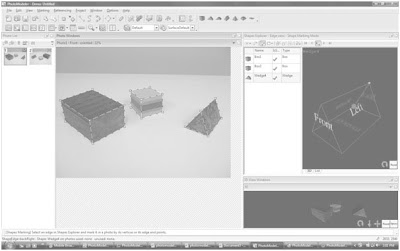
I drew the missing lines onto photo three, then using photo three as the reference image I marked the corresponding points onto photo two. The box was then shown as complete in the 3d model view. 
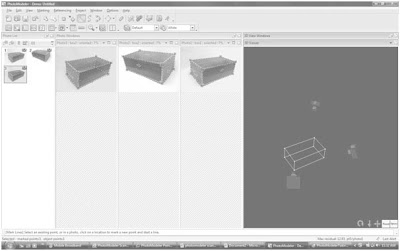
Using the surface tool I added surfaces to each face of the box, which showed as white planes in the 3d view.


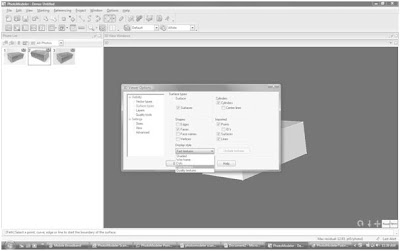
Using the 3d view options I turned on fast textures and the program mapped images from the original photos onto the 3d view. The image was warped warped.

By changing the view option to quality texture I got a more accurate representation of the original box.

I then zoomed in on each point of my box in the original photos and adjusted my frame to better fit the image increasing the accuracy of the model.


Finally I used the project menu to open up the scale/orientate window. Using this window I set the units of my project and used a known length to set a scale. I also set the horizontal and vertical directions.

The program automatically calculated the measurements of the rest of the box. I could then find out any measurement simply by clicking on it.

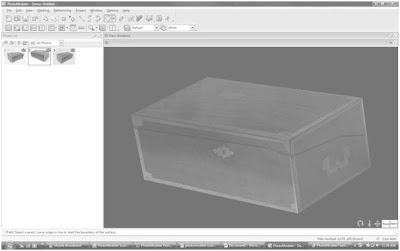
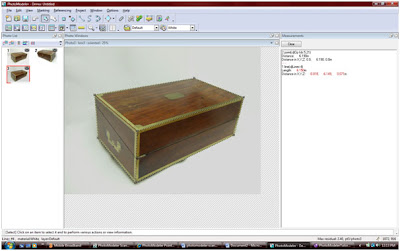
The model was complete and ready to be exported for use in other cad software.


Close Up on Technology: Part Inspection 3D Part Inspection Is a Snapshot Away

Link to article:

http://images.google.com.au/imgres?imgurl=http://www.ptonline.com/mag_images/200607cu2c.gif&imgrefurl=http://www.ptonline.com/articles/200607cu2.html&usg=__tG02cd9dsGU-BD-TtgA7IWwdPcs=&h=430&w=200&sz=13&hl=en&start=18&um=1&tbnid=8enR4X-3RTEbjM:&tbnh=126&tbnw=59&prev=/images%3Fq%3Dphotomodeler%2Barchitecture%26ndsp%3D18%26hl%3Den%26sa%3DG%26um%3D1

Article:


Close Up on Technology: Part Inspection

3D Part Inspection Is a Snapshot Away


By Joseph A. Grande, Senior Editor


Learn More
Visit the
Auxiliary Equipment Zone
Company Info

Bayer MaterialScience LLC, Pittsburgh
(800) 662-2927

Eos Systems Inc., Vancouver, B.C.
(604) 732-6658

A non-contact inspection system uses digital photography for accurate three-dimensional measurement of plastic parts. Developed by Eos Systems, this method is being employed in application development by plastics companies like Bayer MaterialScience. A major advantage of the PhotoModeler system is affordability—it costs only $895 per license—considerably less than coordinate-measuring machines and non-contact laser digitizers.

complex plastic automotive components
With Photo­Modeler, application development specialists at Bayer can detect sub-millimeter dimensional flaws in complex plastic automotive components without expensive CMM or laser scanning instrumentation.

Detecting deformation
PhotoModeler software from Eos is based on the science of photogrammetry, an established measuring technique using photographs, which is mostly used for aerial mapping and analysis. Eos adapted the technology for close-range applications and has found uses in accident reconstruction, architecture, and industrial applications. In plastics manufacturing, PhotoModeler reportedly can be an effective tool for detecting deformation in thin-wall, complex parts. The system is particularly useful for curved or contoured surfaces where 3D measurements are difficult to achieve with traditional inspection tools.

How PhotoModeler Works

PhotoModeler software

Top: PhotoModeler software automates the method of photogrammetry, which calculates distances from photographs. First, one or more digital cameras take 2D photos of a 3D part from different angles.

Center: PhotoModeler calculates the exact position of the camera relative to the part.

Bottom: From multiple images, Photo­Modeler builds a 3D CAD model of the part with exact physical dimensions.

Once the digital camera is calibrated by the PhotoModeler software, the user takes multiple photos of the part. Using automated target acquisition, the software can output a 3D CAD model of the part. In this task, the software can use various reference points such as corners or edges or targets (high-contrast circles) that are specified by the user.

At Bayer, the measurement system is used both in the U.S. and in Germany to help develop new resins for applications such as injection molded automotive body panels. The company must quantify the extent of distortion in the panel that results from a range of weathering conditions.

Benefits vs. contact methods
Finding a suitable method to measure dimensional flaws in a 1-meter-long door panel was difficult, according to Ignacio Osio, principal engineer and manager of Bayer’s application engineering lab. A typical coordinate measuring machine (CMM) utilizes touch sensors that meticulously tap and record each point along a surface. According to Osio, it would be hard to find a CMM large enough to handle a 1-meter part, and painstakingly time-consuming to calibrate the CMM to measure all the curved surfaces. Moreover, there is the potential for physical contact with the part to skew the inspection results. Large CMMs are expensive too, costing up to $250,000.

PhotoModeler to measure distortion of curvature
Bayer used PhotoModeler to measure distortion of curvature in a 1-meter-long body panel.

Linear methods, too, have limitations in measuring curvatures and the same applies to electronic rulers, which would require many square measurements to accurately capture slight distortions of the curves.

To evaluate shrinkage and warpage, Bayer researchers subjected parts to a range of humidity and temperature conditions. The sample parts were photographed from multiple vantage points after exposure. After uploading the digital images into PhotoModeler, certain reference points from each view are matched and the data are converted into a 3D framework. “This part has some amount of sagging that is difficult to detect with a measuring device that is not three-dimensional,” said Osio. “We were even able to pick up some other distortion that is not easy to measure through other means.”

On the 1-meter body panel, Bayer was able to measure changes within 0.1 mm, which is the company’s requirement for inspection. According to Eos, PhotoModeler is capable of even greater detail by increasing the number of photographs and the number of matching control points. Bayer also uses Eos’ add-on automation module called Coded Targets ($395). This system recognizes the target and further automates the process.


Thoughts:

Photomodeler gives accurate measurements without contact. This could be helpful if the item being photographed is too small to accurately measure by hand, or too delicate to touch. If trying to take measurements of an object that is hard to get to this software could also be useful. This article talks mainly about the use of Photomodeler in the car manufacturing industry but one could assume that this technology could be applied to any manufacturing industry. Catia a 3d scanning program used and developed by Frank Gehry originated in the aerospace industry and was also used in several other manufacturing industries including automobile and naval.

The diagrams showing how photomodeler work are simple and helpful, much more useful than anything on their home page. A potential problem when applying this software to an architectural level is the inability get photos of the entire building due to their scale and other buildings,vehicles and vegetation in the way.

This article discusses the use of Photomodeler to detect warpage and shrinkage in products. This process could possible be applied to architecture detecting structural deflection in completed buildings.


Photomodeler potential

Link to Article:

http://images.google.com.au/imgres?imgurl=http://www.photomodeler.com/about_us/images/presskit/Messancy_elipsoids_Large.jpg&imgrefurl=http://www.photomodeler.com/about_us/presskit.htm&usg=__e86AmWpOVkdS7xEHYZ6TKeKx14M=&h=590&w=821&sz=297&hl=en&start=1&um=1&tbnid=zb-8heuzufAieM:&tbnh=103&tbnw=144&prev=/images%3Fq%3Dphotomodeler%2Barchitecture%26ndsp%3D18%26hl%3Den%26sa%3DG%26um%3D1

Image:


Thoughts:


It would be interesting to know how much it would cost a firm to purchase licenses and train staff to competently use this software? How long would it take before firms could save/make money by using this software? I wonder if any firms in Perth currently use this software? PhotoModeler shows great potential but is not well known. This is probably because it is a relatively new technology that is still having the kinks ironed out of it. Perhaps if students start learning about new technologies such as this at uni they can take the knowledge into the working world. When they graduate they can teach older architects of the possibilities of technology. This suggest that there will be a time delay before this technology has any affect on the architectural world.


This image show the potential of Photomodeler for creating 3d models of existing buildings. This project uses the software as a surveying tool. This sought of use of the software could be useful when renovating or building additions to existing buildings. It could possibly save heaps of time normally spent measuring the existing building. Photomodeler could also be used to create 3d images of historical buildings which need to be well documented.

Other 3d photogrammetry software available

Link to article: http://www.imagemaster3d.com/

Article:

Imagemaster builds on the proven capability of Topcon's acclaimed PI-3000 photogrammetry software that allows accurate 3D modeling from stereo photographic images taken with a standard digital camera. The process is used to generate accurate line models, 3D surface models (TINs), Ortho-images and point clouds - the latter at a fraction of the cost of a laser scanner.

Imagemaster now combines the Image Surveying (IS) robotic total stations with built in cameras to create a package that delivers the advantages of Photogrammetry, laser scanning and total station survey into one powerful package. Now you can augment your 3d data with imagery to easily describe the site in both visual and geometric quantities. Open up your information to everyone communicating with real life photographic imagery.

Thougths:

Appears to be similar software to PhotoModeler. Reinforces the idea that 3d photogrammetry software is a cheaper option than a laser scanner. What does it cost? I could not get a free version of this software to work on my computer. It would be intersting to see how different form PhotoModeler it is. I have been having a lot of problems getting PhotoModler to work on more complex images. I wonder if this software is any more user friendly?

Cost of Photomodeler

Link to article: http://www.photomodeler.com/products/default.htm

Article:

PhotoModeler
PhotoModeler
Automation
PhotoModeler
Scanner
Create CAD-like models YesYesYes
Perform accurate measurements YesYesYes
Model man-made shapes YesYesYes
Print and use Coded Targets YesYes
Automate Projects YesYes
Create dense surface modelsYes
Model organic and natural shapes Yes

PhotoModeler is the base product. PhotoModeler Automation adds coded targets and project automation. PhotoModeler Scanner contains all the capabilities of PhotoModeler and PhotoModeler Automation, and adds scanning and dense surface modeling (along with the Idealize module as well). If you have projects that fall in all columns of the table then PhotoModeler Scanner is your best choice.

PhotoModeler
PhotoModeler
Automation
PhotoModeler
Scanner
Castle 3D surfaced
RAD coded targets
Airplane 3D model
Human back scan
Footprint scan

My application is:

  • architectural structure
  • accident scene diagrams
  • crush measurement
  • piping and process plants
  • archaeology
  • perspective / background plate matching

My application is:

  • rapid turn-around measurement
  • targets applied to surfaces
  • industrial high-accuracy 3D point measurement
  • crush measurement
  • piping and process plants
  • dynamic tracked objects (with PMV module)

My application is:

  • architectural surface scans
  • quarries / mining
  • stock pile profiles and volumes
  • cliff / rock faces
  • human body / back / face / feet scans
  • non-contact curatorial scans
  • boot & foot prints

USA & Canada Price:¹
$995us
USA & Canada Price:¹
$1295us
USA & Canada Price:¹
$2695us
PhotoModeler
PhotoModeler
Automation²
PhotoModeler
Scanner²

¹ These prices are for North American customers ordering directly. Overseas resellers sell for a different amount to account for shipping costs, duties, taxes, and local support.
² PhotoModeler Automation is a bundle composed of the PhotoModeler base product and the Coded Target Add-on Module. PhotoModeler Scanner is a distinct product.

Other Products
Add-on modules, camera bundles and accessories (such as slides and evidence markers) are described on the Other Products page.

Thoughts:

$995 - $2695 American dollars, is a fairly affordable price for a company to pay. In comparison Cad licenses cost upwards of $10 000. I would however think that Cad programs would be more helpful to a firm than software such as this. This software is interesting and could be used in the architectural world but it is not necessary, Cad programs are. Very few students are learning to hand draw now days as it is simply outdated. Firms who choose not to use Cad programs will find it very hard to find staff and this is only going to get harder. By the looks of the images on this page complex models are possible. I wonder how much training/practice is required to produce models like that.

photomodeler

Link to home page: http://www.photomodeler.com/index.htm

Quote:

"Accurate and Affordable
3D Modeling-Measuring-Scanning

PhotoModeler photogrammetry software provides image-based modeling, for accurate measurement and 3D models in engineering, architecture, film, forensics, and more! The most cost-effective and affordable way to do accurate 3D scanning, measurement and surveying. Try the download, watch a product tour or pick your application area below."

Thoughts:

Accurate and affordable compared to what? What other software is available? What is the cost of 3d scanning equipment? How easy/ convenient is this software to use? Can complex structures be modeled?

Photosynth - compititon

Link to Article: http://blogs.msdn.com/photosynth/


Article:

Picture the ImpossiblePosted Tuesday, September 22, 2009 11:23 AM by synthy
Less than two weeks ago, an alternate reality game created by the Rochester Institute of Technology and the Rochester Democrat and Chronicle newspaper called " Picture the Impossible" began. Intended to engage members of the community in an exploration of Rochester, different games and activities were designed for the competition.

One of the challenges in the game was to create the best Photosynth of one of the 'Horses on Parade' sculptures in Rochester, NY. The competition is done and the results are in! They had nearly 150 entries in total.

I want to take the opportunity to thank and congratulate the participants and winners of the "Picture the Impossible Photosynth Horses' challenge.

Thanks to Bing for sponsoring the technical development for the games, and Elizabeth Lawley for promoting the use of Photosynth within them.

-Jonathan

Thoughts:

The synths created for this compition are based around 3d objects rather than panaramic views. The result is not a 3d model you can rotate arund but rater a series of still images taken around the object. The synth does provide views of the horses from all angles but a storey bord of the photos would give a similar effect. A storey bord would also be more time and cost efficient to create. "The best thing to happen to photography since the digital camera." — slate.com ??? definately not.

Photosynth - Trial 1

I used the following photos to create my first photosynth.


The result.


Link to the result:
http://photosynth.net/d3d/photosynth.aspx?cid=82489a64-f592-4b45-98e9-0380f975c3ff


Thoughts:


Results are similar to those of auto stitch. It matches pixel colours and patterns to stitch together photo's to create a curved panaramic view so it gives the allusion three dimensionality. I t does not as i first thought create 3d digital models of existing objects. It could still be helpful during the site analysis process or used for backgrounds of rendered views of 3d models. The ability to store and share these images online is this softwares greatest strenght. Synths could be created of existing buildings, proposed sites etc... and shared with other architectural firms who don't have physical access to the site. The software is very easy to use and syths can quickly be created. The biggest weekness of the software is the inability to export the resulting images for use in other programs. The ability to import the completed synths into programs such as Photoshop, Indesign and Powerpoint could make Photosynth a very powerful presentation tool.